
Description
The I2cKeypad library provides easy to use functions for reading a matrix keypad. Library functions such as getKey(), peekKey() and getKeyCount() are included. The I2cKeypad library works with Arduino, Particle (Photon, Electron, and Core) and Raspberry Pi boards and it provides many functions to communicate with matrix keypads that use the I²C communication protocol using the MCP23008 interface chip.
- Github repository for the Arduino software library
- Github repository for the Particle software library
- Github repository for the Raspberry Pi software library
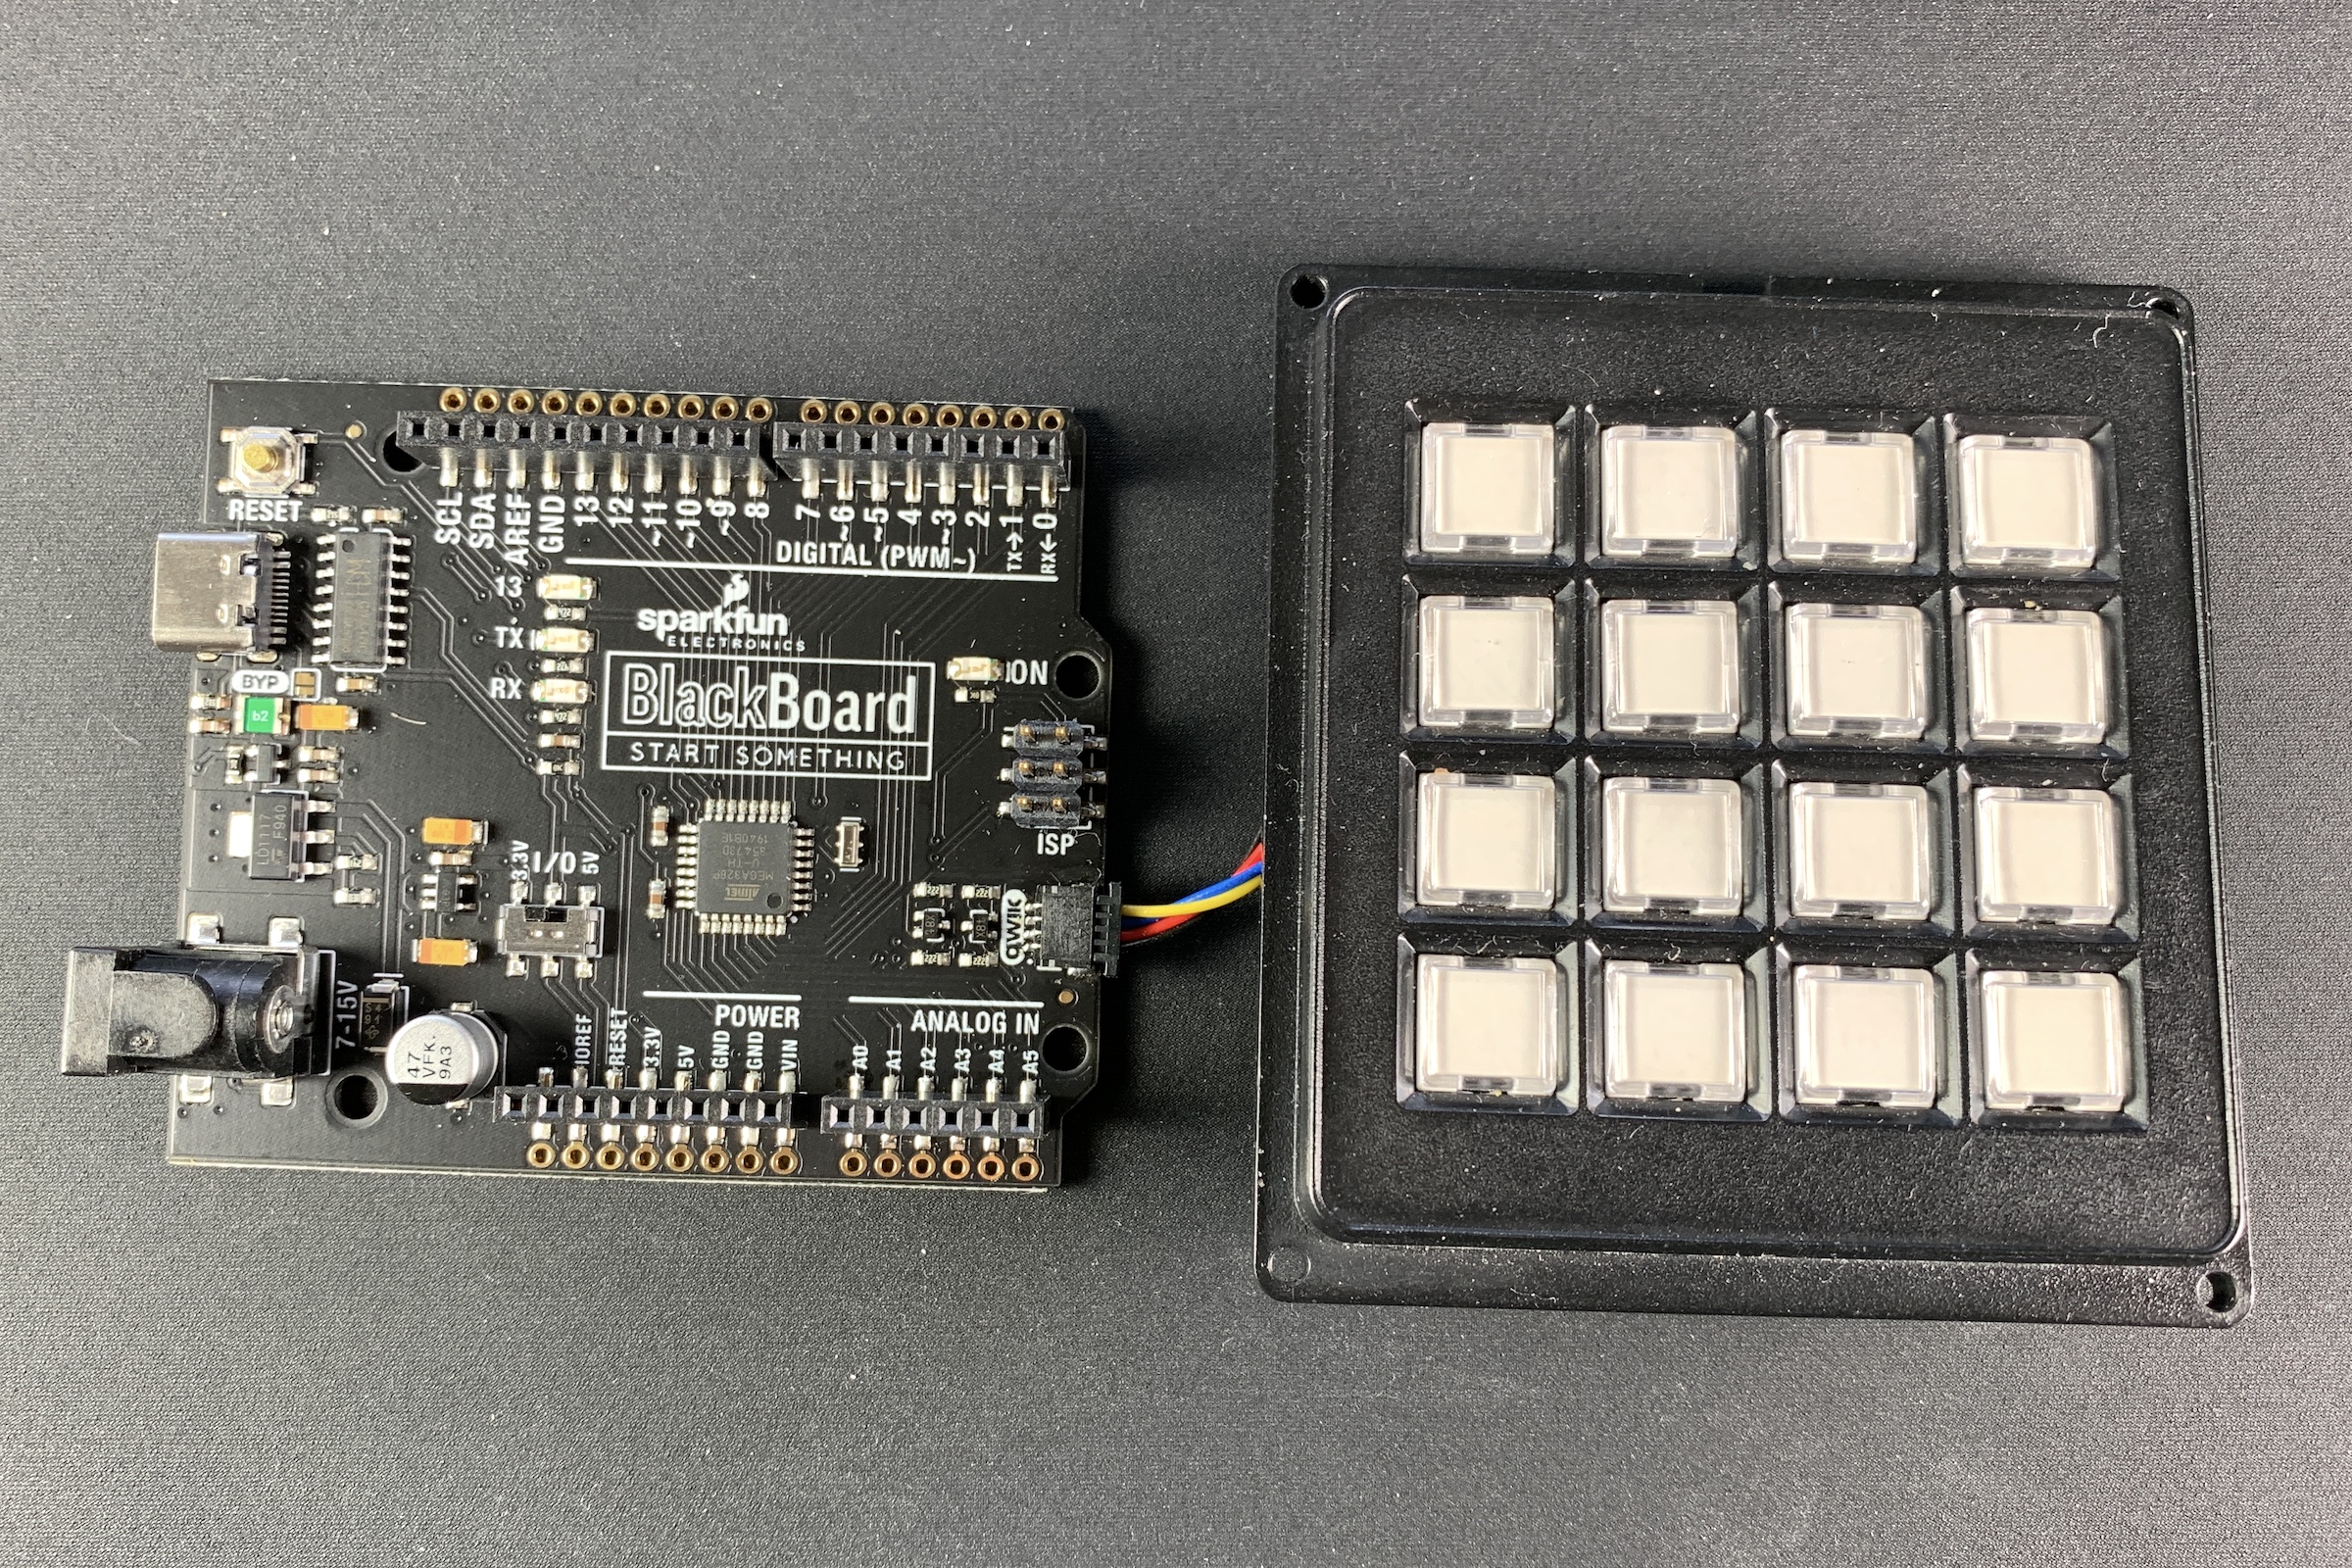
Compatible Hardware
This library requires
* An Arduino, Particle (Photon, Electron, and Core) or Raspberry Pi microcontroller board
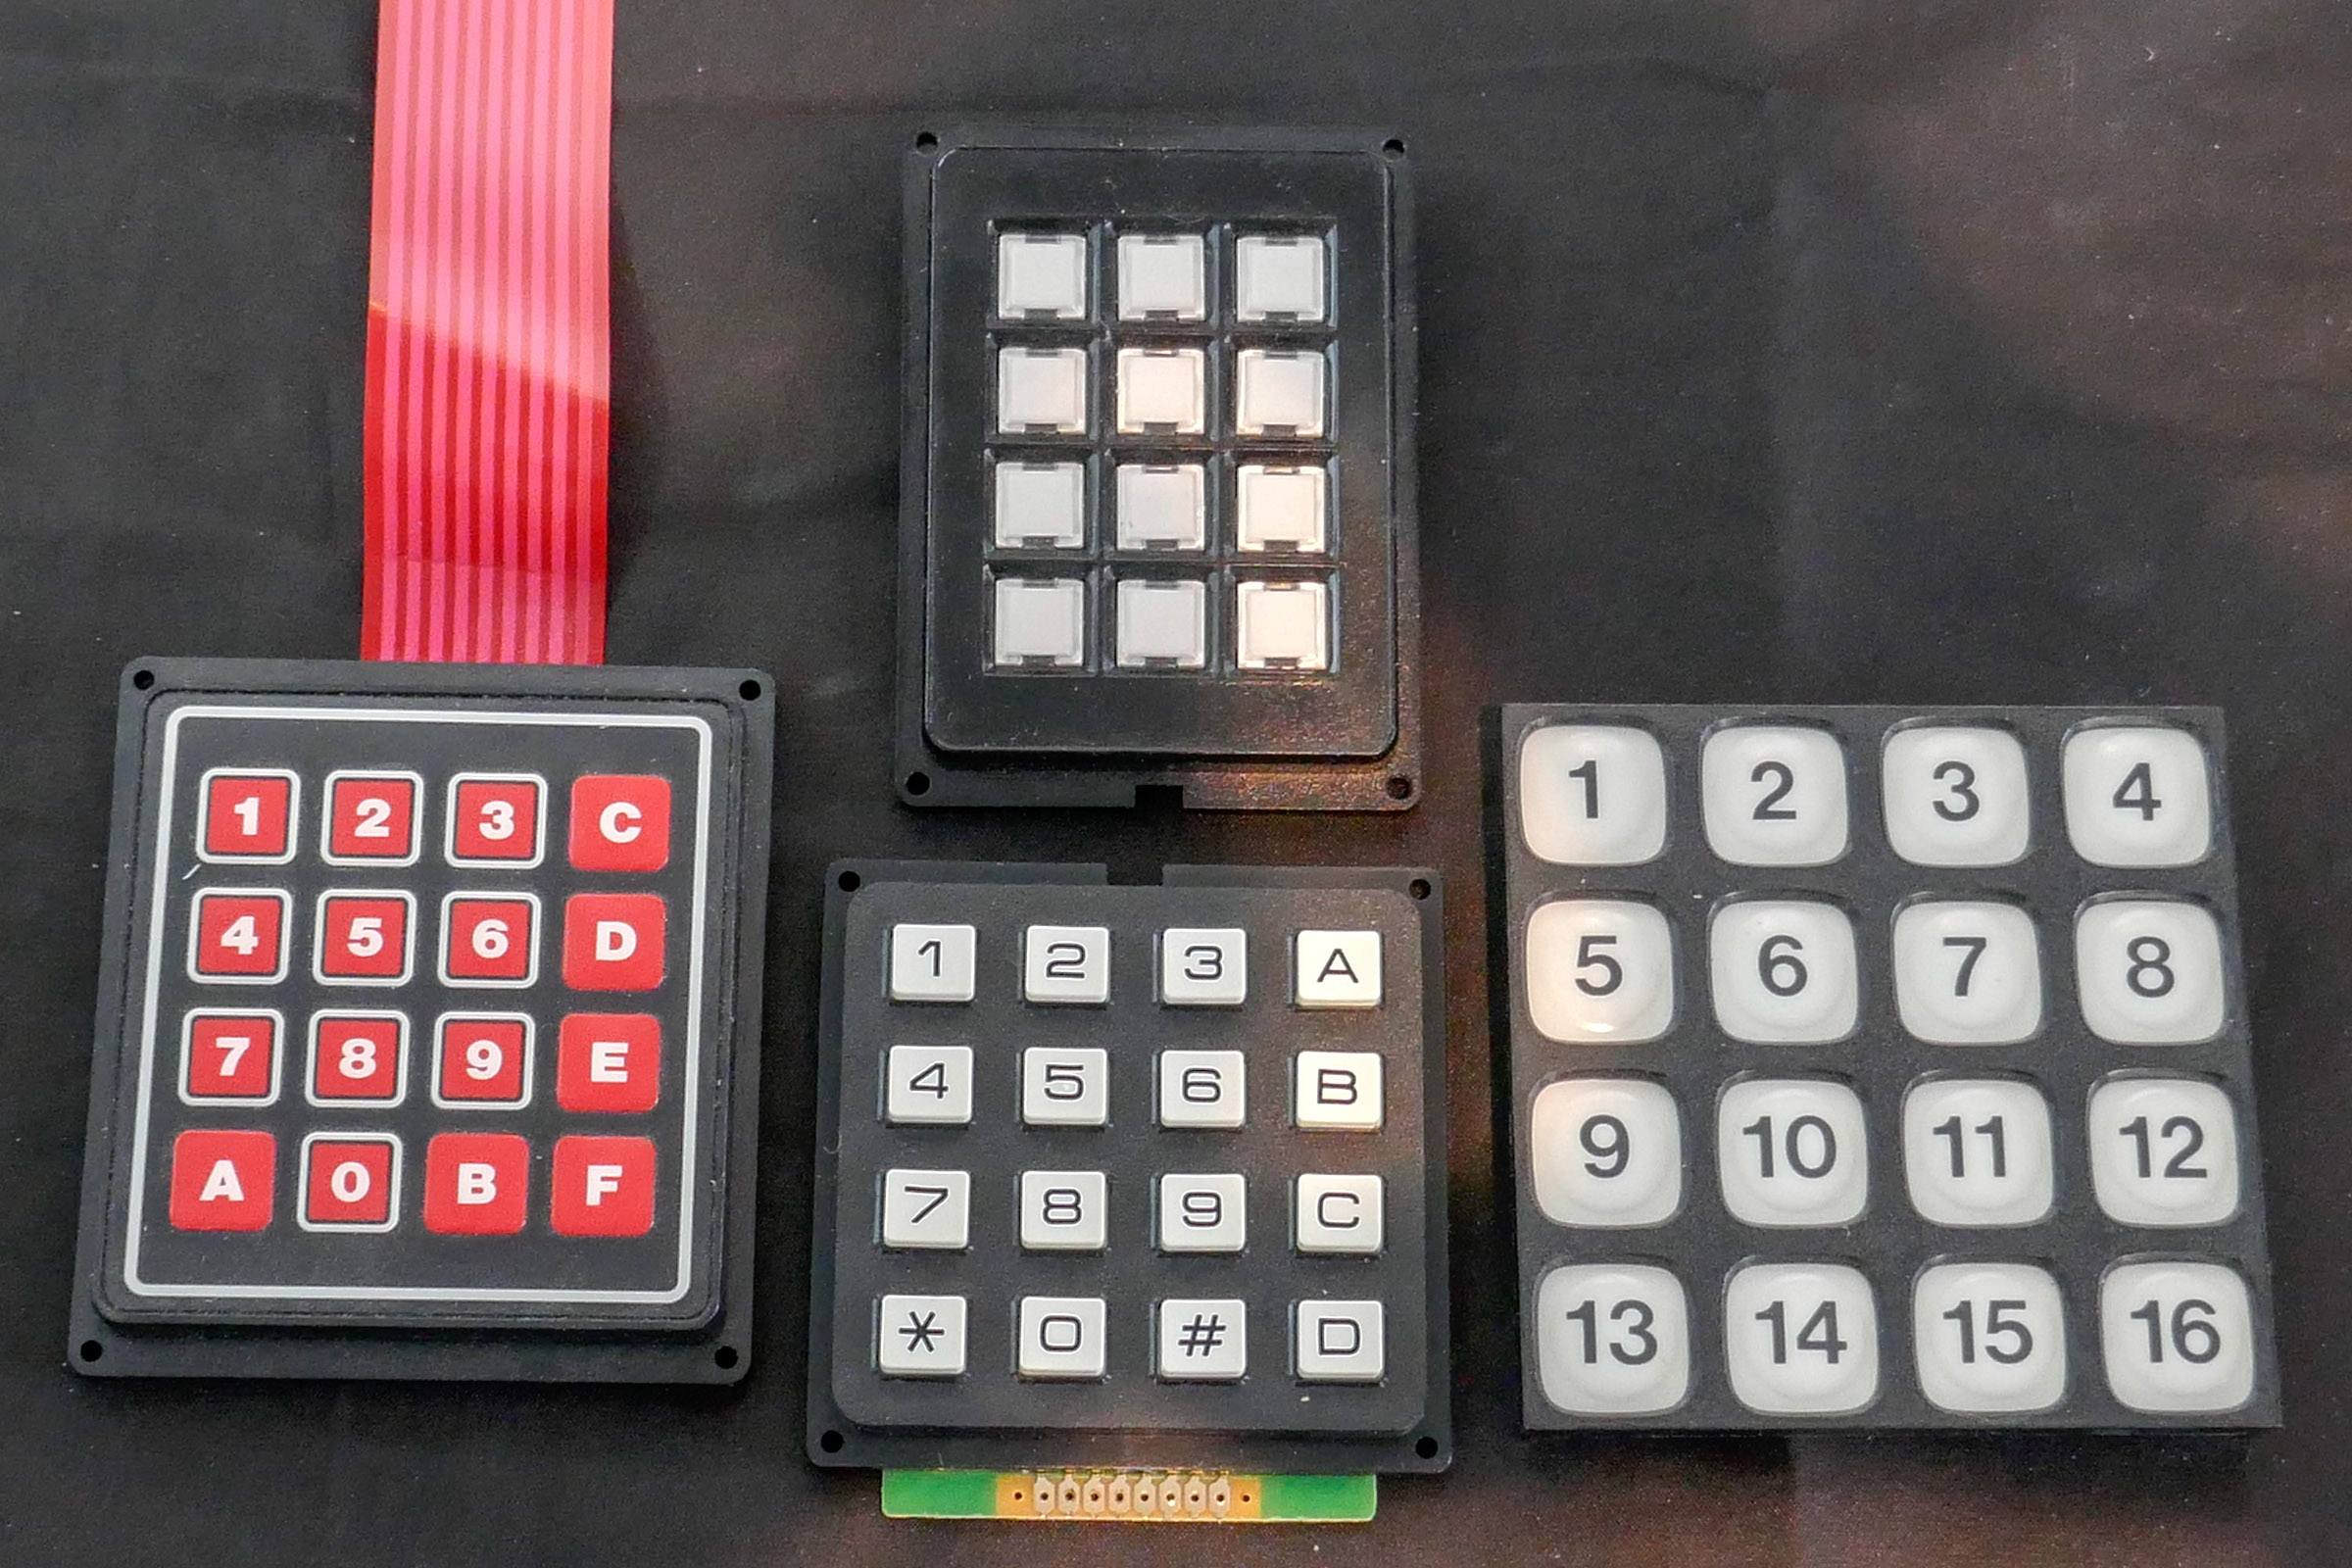
* A matrix style keypad with up to 16 keys.
* The keypad can have a maximum of 8 pins.
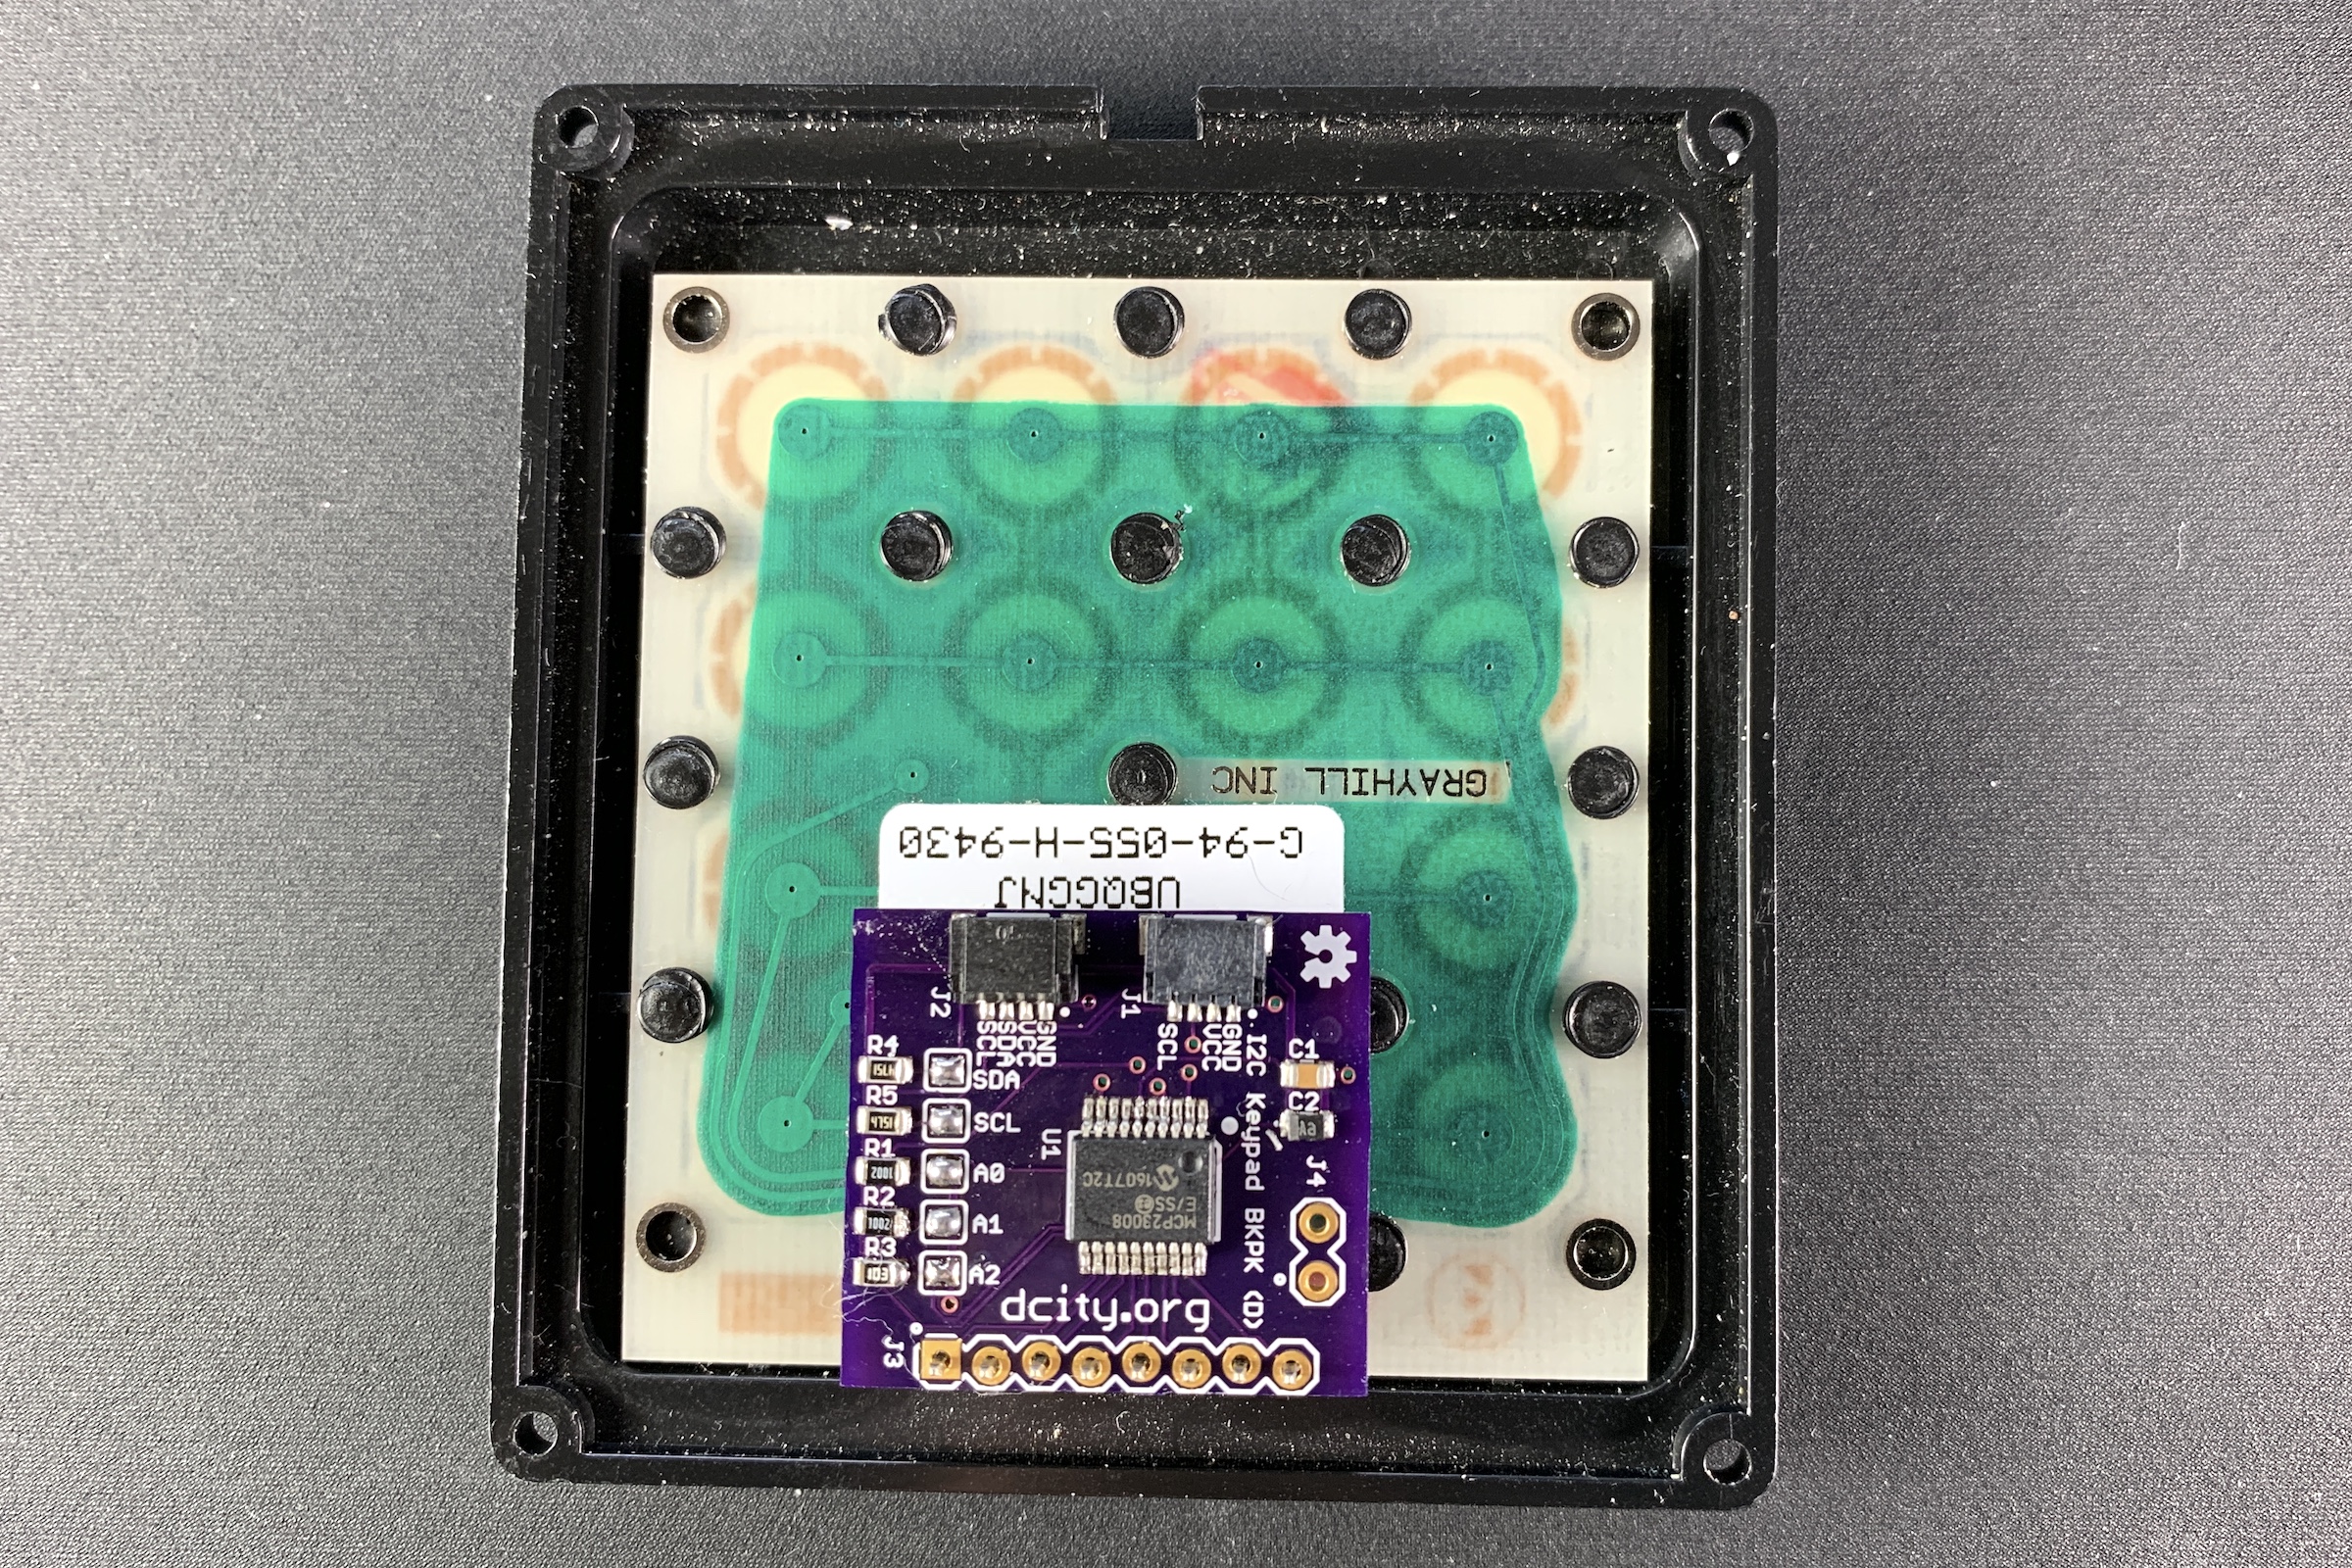
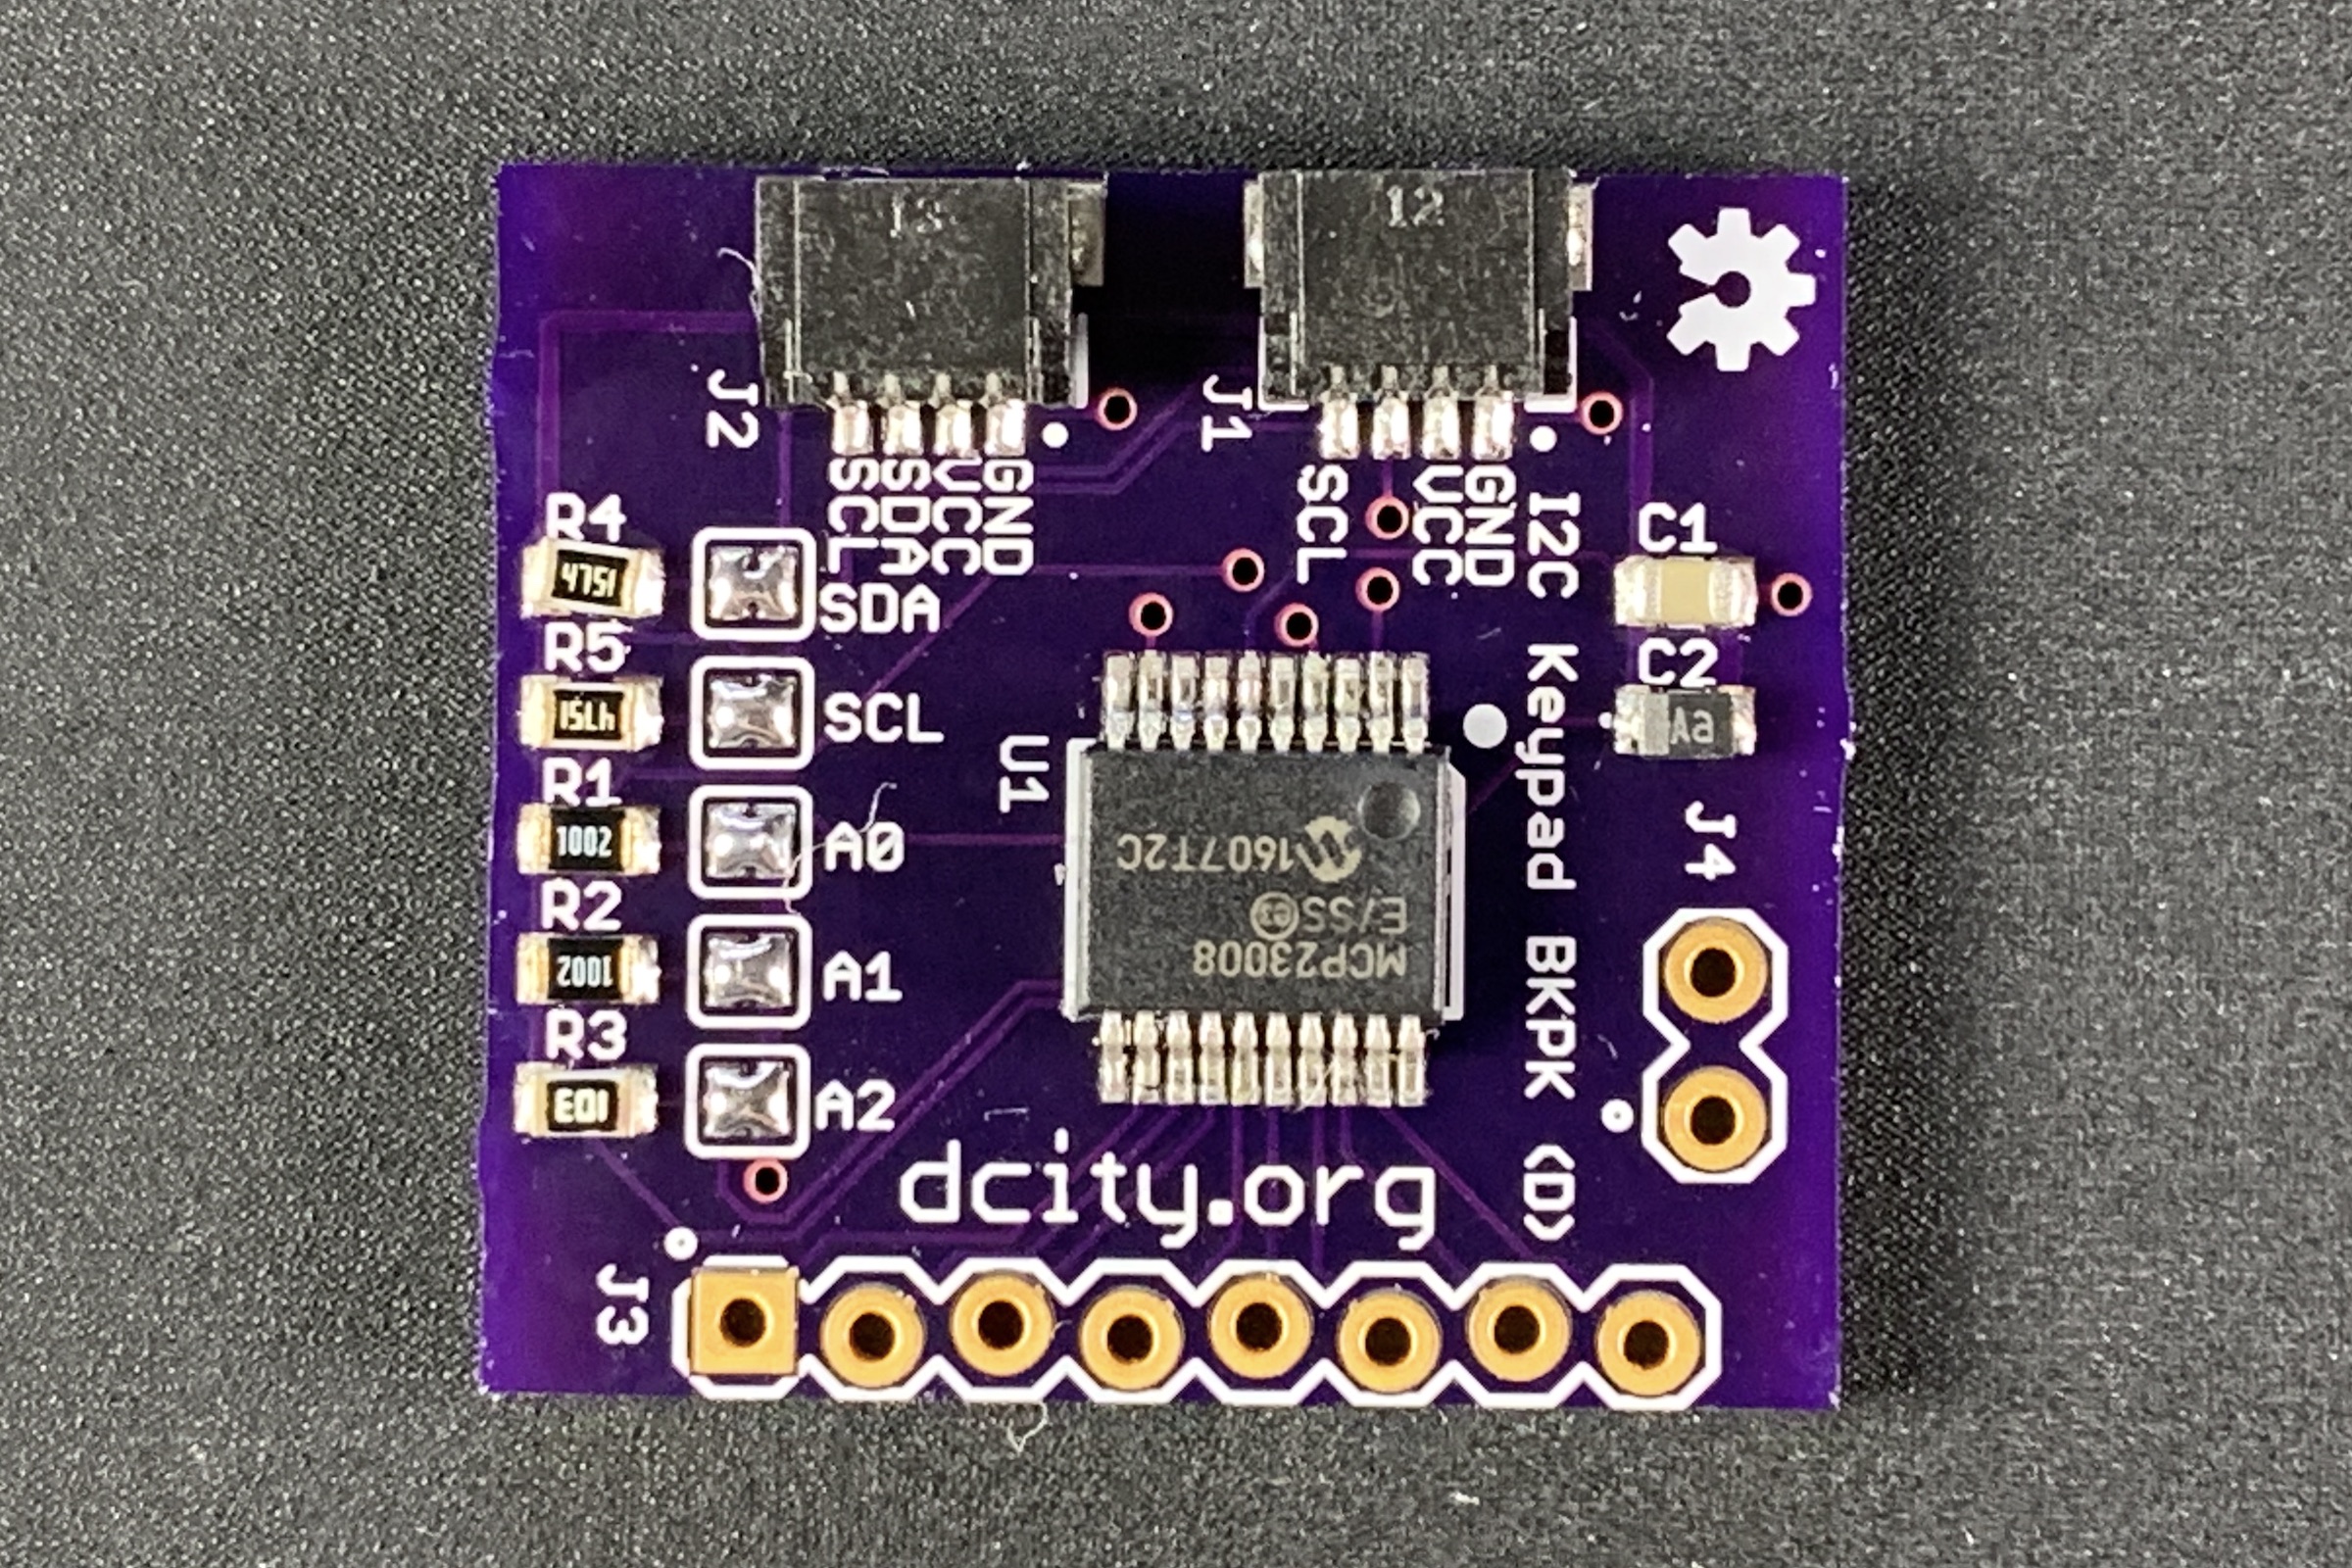
* A backpack board with a MCP23008 I²C interface chip is needed on the rear of the keypad to provide the two wire I²C interface between the microcontroller and the keypad.
Here is an example of an I²C Keypad backpack board.
Library Installation
Arduino IDE
Arduino provides several methods for installing libraries. The following is one of the easiest methods.
- Importing a .zip Library into the Arduino IDE:
- At the Github repository for the Arduino version of I2cKeypad library click on “Download ZIP” button above the list of files (you may need to be signed in to Github to see this button).
- This will download the library files to your computer.
- Then in your Arduino IDE, click on the menu item Sketch > Include Library > Add .ZIP Library.
- Navigate to zip file you downloaded and open it.
- Then click on Sketch > Include Library.
- Select I2cKeypad from the list, and the library files will be ready to use in your sketch.
- You will need to restart the Arduino IDE in order to use the library and see the I2cKeypadDemo.ino program listed.
- To run the demo program, click on the menu item File > Examples > I2cKeypad.
This Arduino library and demo program is also available from our github repository.
Particle IDE
Using the Particle Web IDE
- To run the I2cKeypadDemo program:
- Click on the “library” icon on the far left side.
- Scroll to find the I2cKeypad Library, and click on it.
- Click on the file name “I2cKeypadDemo.ino” (near the bottom left)
- Click on the button “USE THIS EXAMPLE”. This will create a new app with the demo program and the library files, which you can examine, compile or flash to a device. (Note: If you get an error saying that it can’t find the “I2cKeypad.h” file, add a blank line anywhere in the demo program and recompile again).
- To add the I2cKeypad library to an existing app:
- Click on the “library” icon on the far left side.
- Scroll to find the I2cKeypad Library, and click on it.
- Click on “INCLUDE IN PROJECT”.
- Click on the app that you want to add the library to. Click on “CONFIRM”. An include statement will be added to the top of your app.
This I2cKeypad library and demo program are also available from our github repository.
Raspberry Pi
- To download the Raspberry Pi I2cKeypad library and demo program from GitHub, follow these steps:
- You will need the git application on your RPi (if you don’t have it already). In terminal type: sudo apt-get install git-core
- Next, change to the directory where you want in save the I2cKeypad library and demo program. For example, to change to your Documents folder, type: cd /home/pi/Documents
- Then download and save the library by typing: git clone https://github.com/dcityorg/i2c-keypad-raspberrypi.git
- Change directory to the one just created: cd i2c-keypad-raspberrypi
- This directory should now contain the library and demo program for the I2c Keypad (written in Python)
- To run the demo program, type: python3 I2cKeypadDemo.py
- To install just the I2cKeypad.py library module onto your RPi where other python library modules are saved, follow these steps:
- You will need the git application on your RPi (if you don’t have it already). In terminal type: sudo apt-get install git-core
- The following will run the setup script from our github repository and install just the I2c7SegmentLed.py library module on your RPi.
- In terminal type: pip3 install git+https://github.com/dcityorg/i2c-keypad-library-raspberrypi.git
- Put the following at the top of your python program to use this library module: from I2cKeypad import I2cKeypad
- Installing the library module this way allows you to use it from any directory, without having to put the library module in the same directory as your own python program.
This Raspberry Pi library and demo program are located in our github repository.
Functions in the I2cKeypad Library
- begin() – required to initialize the keypad. Run this in setup()! (Not used in Raspberry Pi library).
- scanKeys() – scan for keys pressed, and puts them in the keypad buffer. This can be run in the loop() function so you don’t miss keys. (Not used in Raspberry Pi library).
- getKeyCount() – returns the number of characters in the keypad buffer.
- byte peekKey() – returns the next character in the keypad buffer without removing it from the buffer.
- byte getKey() – returns the next character in the keypad buffer and removes it from the buffer.
- byte getKeyUntil(timeoutPeriod) – returns one key from the keypad buffer, or waits up to timeoutPeriod for a keypress to occur.
- flushKeys() – flush the keypad buffer (removes all keypresses saved in the buffer).
License Information
Our License Information is here.
Leave a Reply